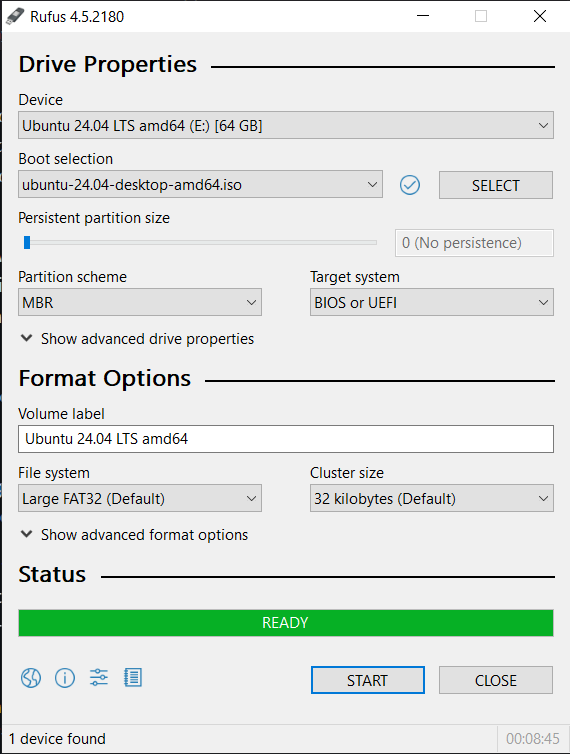
Flashing USB stick with Ubuntu
We will have pre-flashed USBs at the InstallFest if you don't have one. If you are using one of these you can skip this, please ask!
This section explains how to flash your own USB stick for installing Ubuntu in a standalone or dual boot configuration.
If you are installing a VM or WSL, or are borrowing a USB from us at Installfest you can skip this can start installing now
Before starting, download Ubuntu Desktop LTS from https://ubuntu.com/download/desktop. LTS stands for Long Term Support, so this system will be supported for at least the next 5 years without an upgrade to the next version.
You'll get an ISO file, which is a disk image. You need to flash this to a USB drive using an imager tool, we recommend Rufus. Warning: Flashing a USB drive will overwrite any data currently on the USB. Please make sure to backup any data you do not wish to lose.
In Rufus:
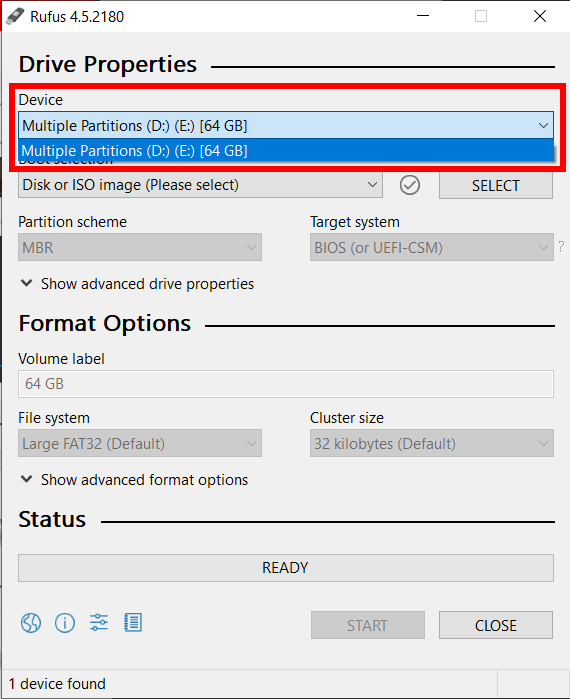
- Select the USB device you want to flash (plug it in first!)
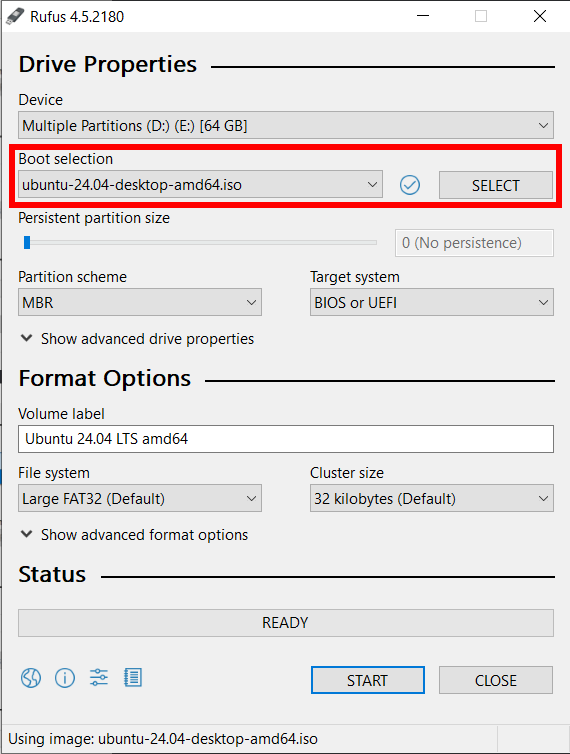
- Select your ISO file
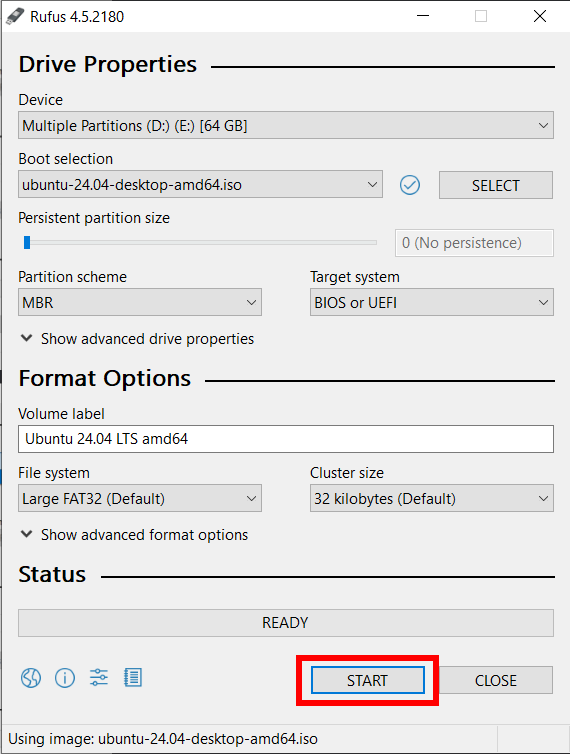
- Press start (we advise leaving all other options default)
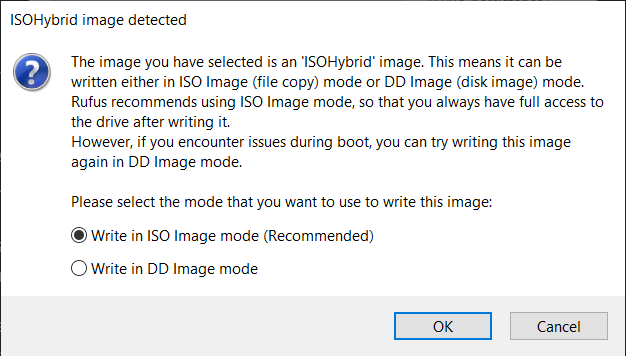
- If you receive the following pop-up, select 'ISO Image mode' and press OK
- Wait! It may take a while, but when the bar is fully green, the drive is flashed