Virtual Machine Pre-install
If you're looking to install Linux in a Virtual Machine, you need to make sure of two things:
- Virtualisation is enabled in BIOS
- Installing VirtualBox
You will need:
This guide will tell you how!
Enabling virtualisation in BIOS
Intel CPU users:
Reboot your computer and go into your BIOS/UEFI. You usually need to press F1, but check for your specific key. Google is your friend :-) Your BIOS/UEFI might look different than the images below, but they all have these functions!
Once you are in the BIOS/UEFI navigate to the Security tab. You probably don't have mouse, so just use the arrow keys.
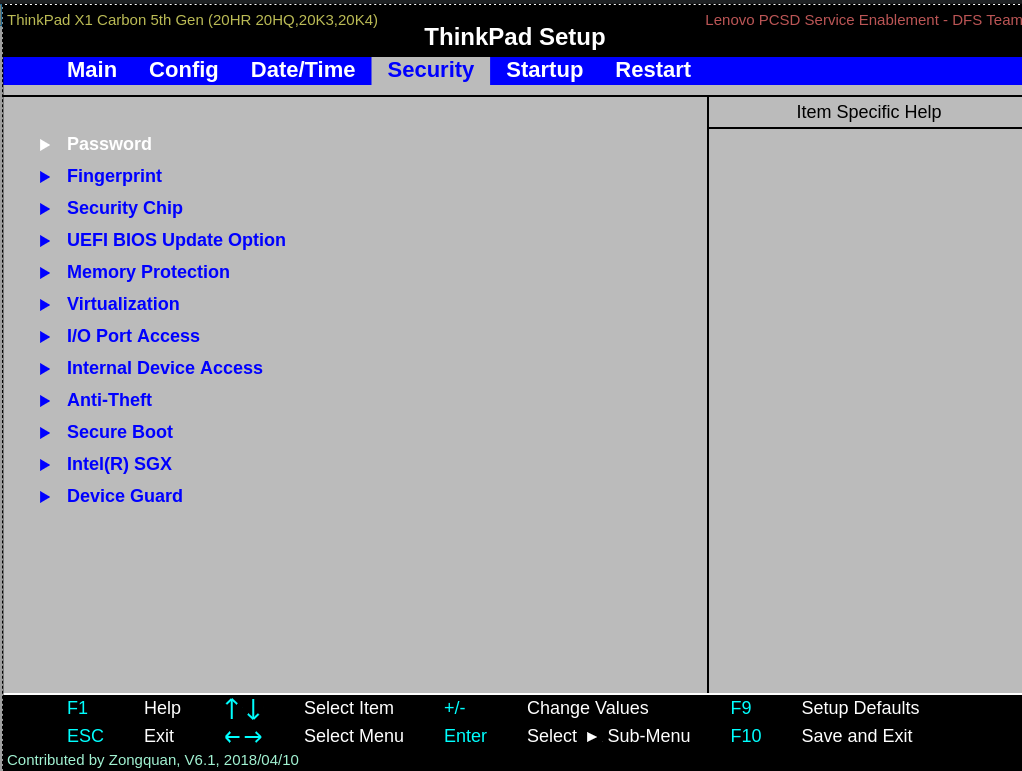
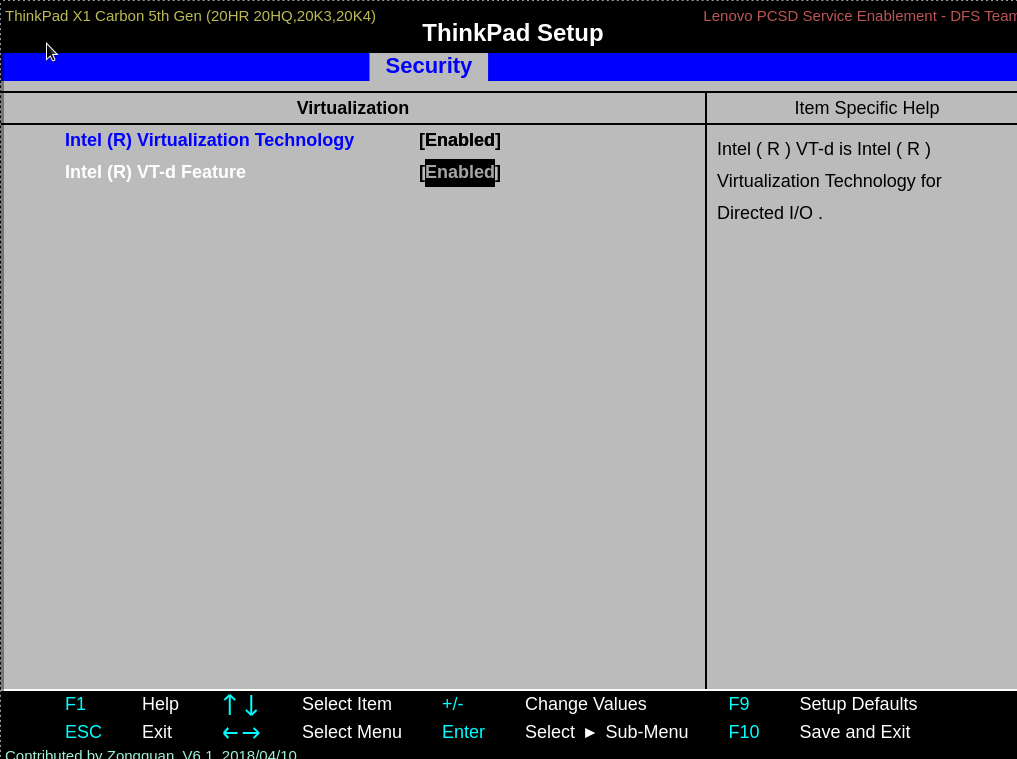
Once in the Security Settings, navigate to the Virtualisation settings and press Enter. Enable both Intel Virtualisation Technology and Intel VT-d Feature.
Then press F10 to save and exit. Confirm you want to save the settings.

Done! You're ready to get started on your VM journey!
AMD CPU users:
Reboot your computer and go into your BIOS/UEFI. The key you will need to press varies, but it should be F1, F2 or DEL. Check for your specific key (you can google it if you know your motherboard manufacturer, or look for a prompt on screen when booting).
Your BIOS/UEFI might look different than the images below, depending on your motherboard, but you will need to find the configuration items related to the CPU/processor. They might be under Processor, Chipset, Advanced CPU configuration or Northbridge.
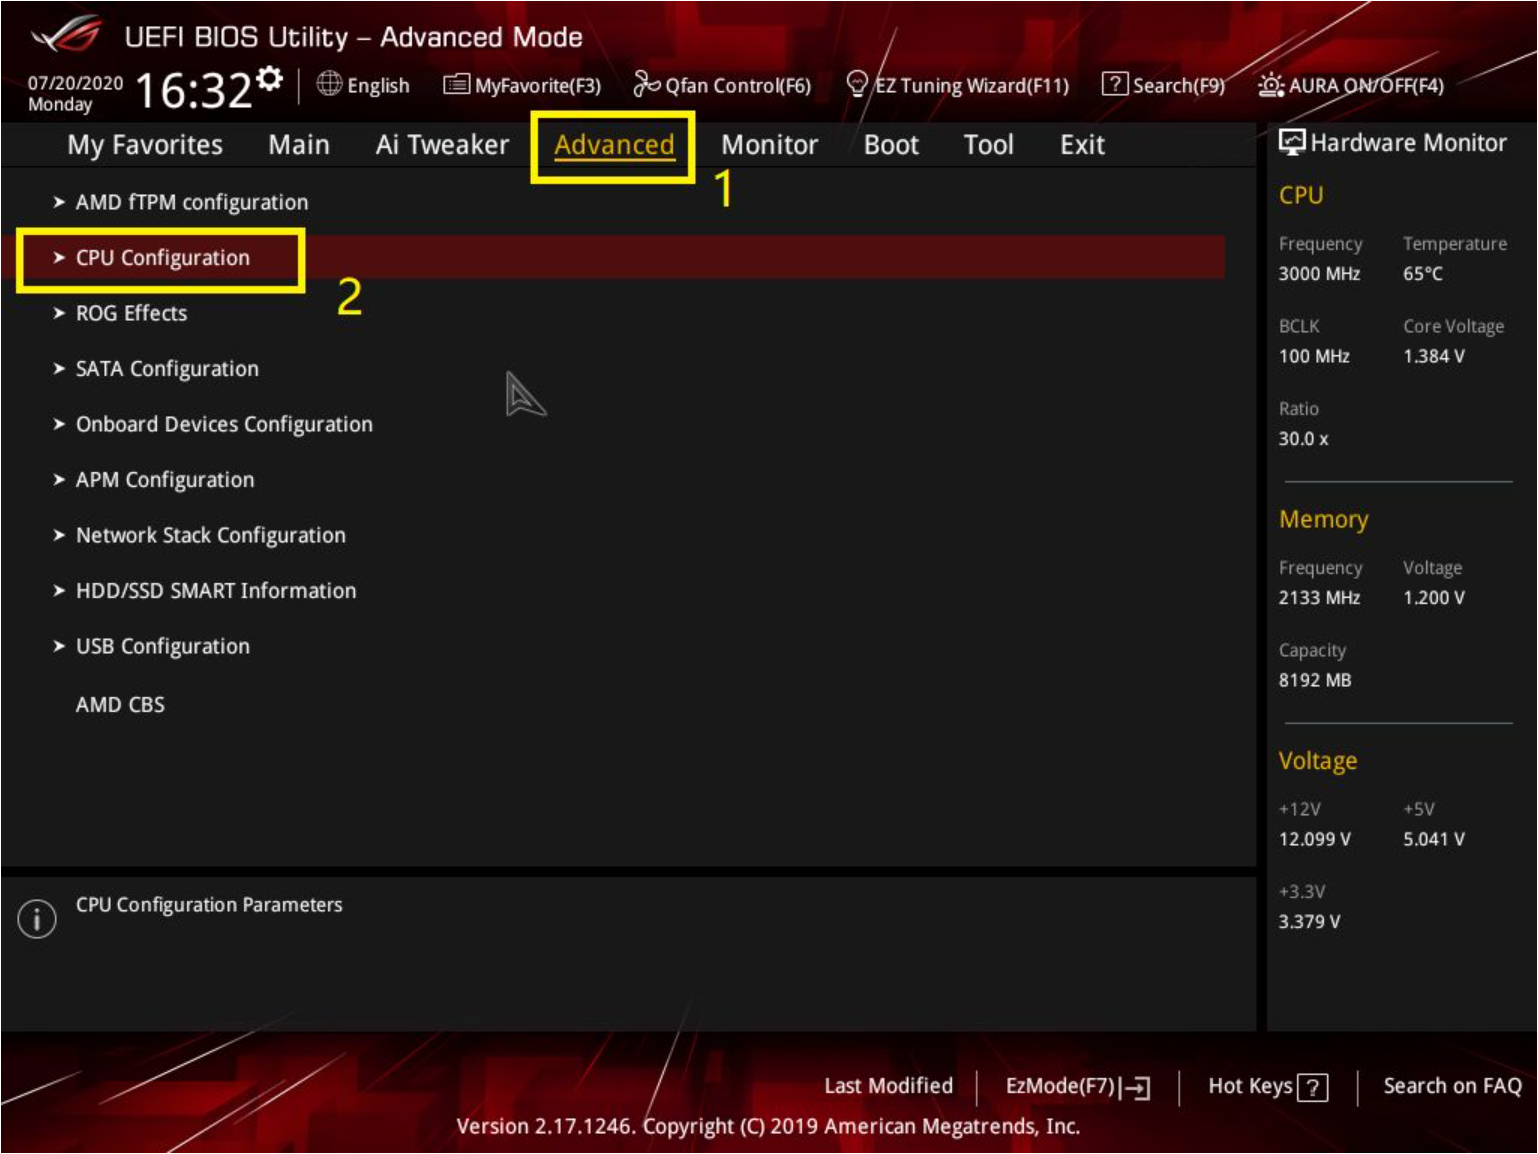
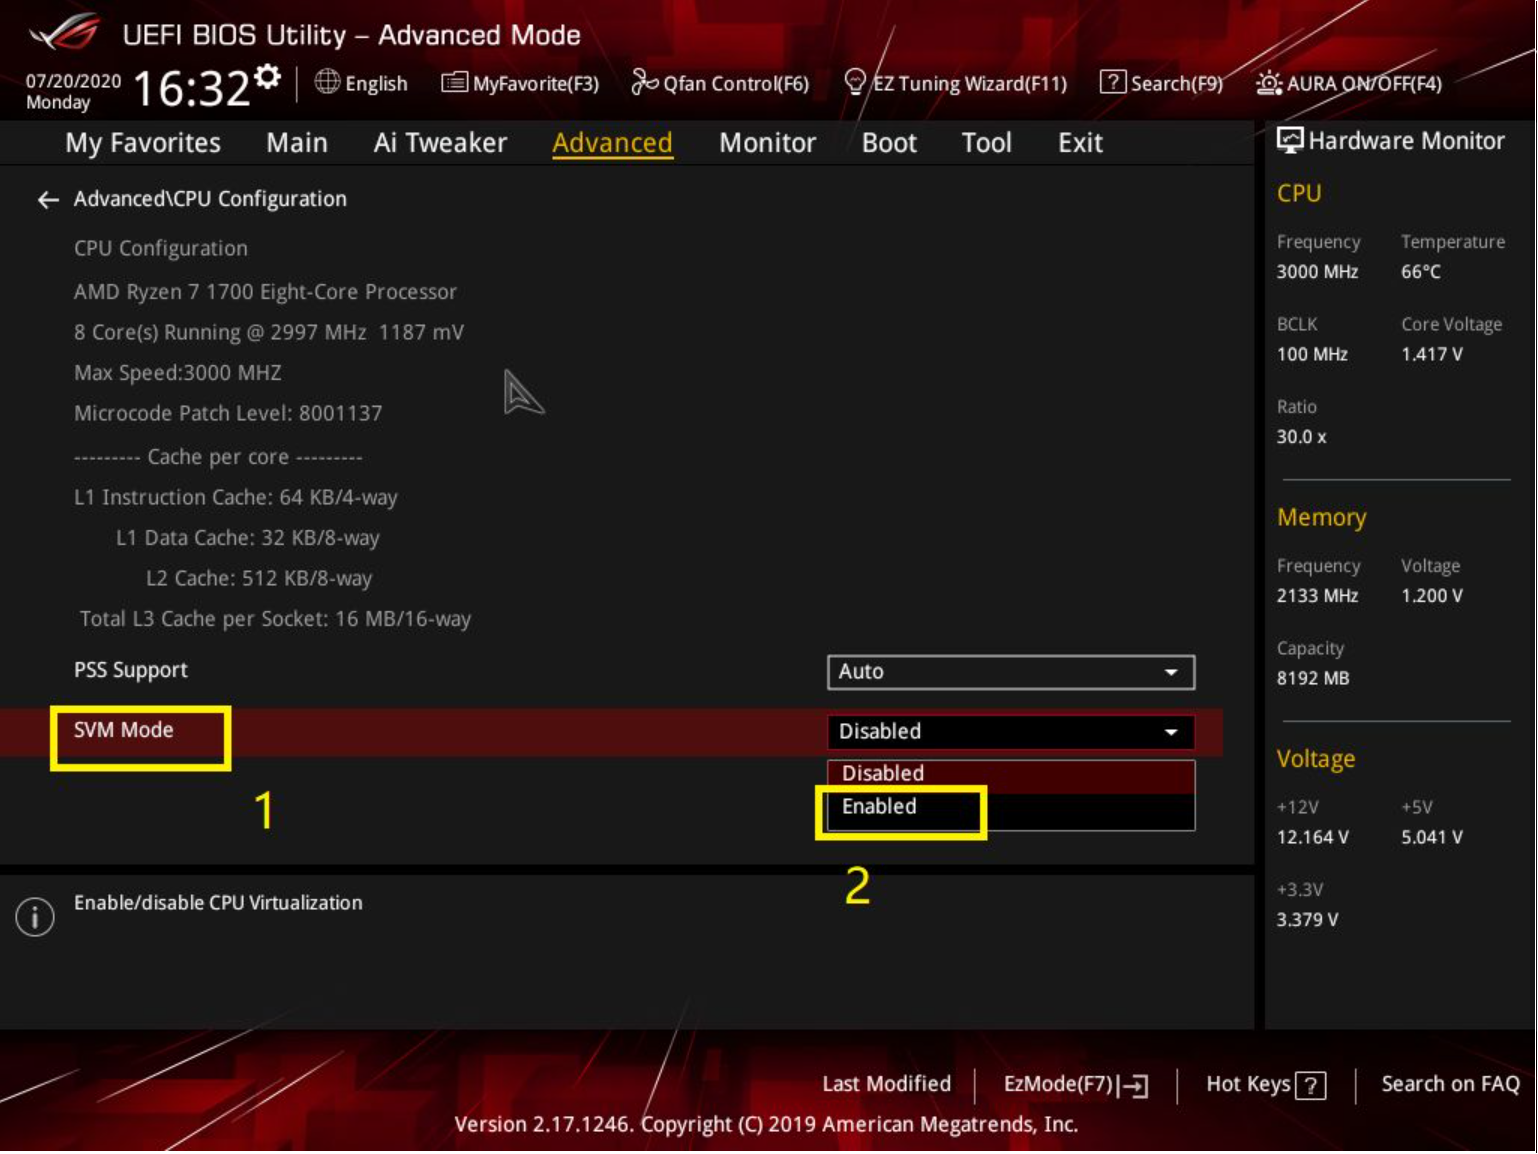
Here, you will need to locate the virtualisation option. It might be labelled SVM mode, AMD-V, AMD IOMMU, VT-x or Vanderpool. Make sure that it is set to enabled.
Save changes and exit (press F10).
Installing VirtualBox
Download VirtualBox from the above link and run it. Make sure all the features are enabled.
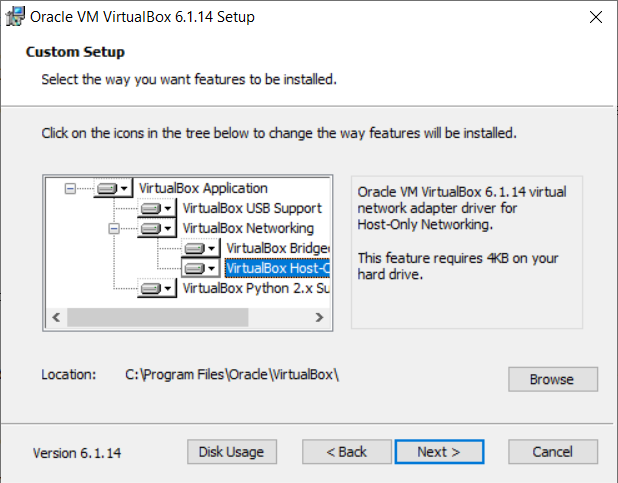
Proceed by clicking Next and confirm installation when notified network
might disconnect while VirtualBox is installing.
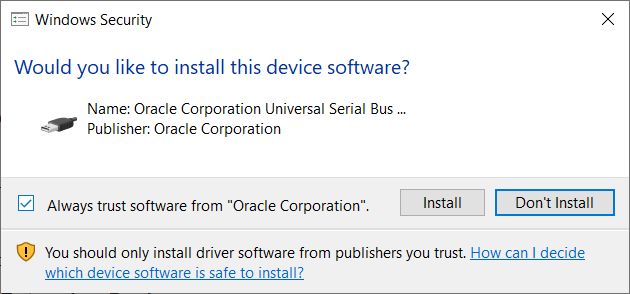
You will be prompted to install drivers for it, proceed their installation.
Congrats! You can now start VirtualBox!
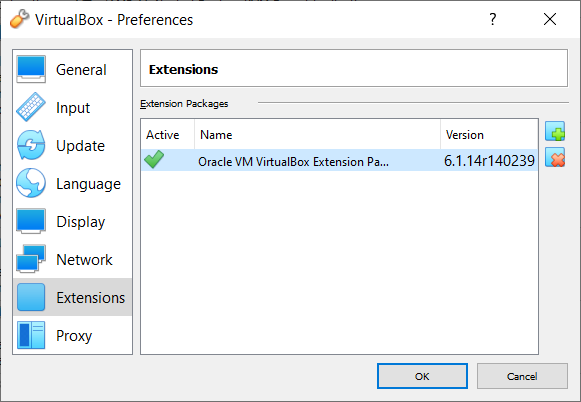
Installing VirtualBox Extension Pack
VirtualBox Extension Pack will add some extra functionality to the VM, which you might find convenient, most important being support for virtual USB 2.0/3.0 controllers.
Open VirtualBox, then go to File -> Tools -> Extension Pack Manager. Click the +
button (on the right hand side of the window) to add the extension. Navigate
to where the Extension Pack was saved and select it.
You will be prompted that you are about to install an extension pack. Confirm by pressing Install, then Agree with the T&C.
Upon successful addition you should see the pack in the list:
That's it! Now head over to here.