Installing Ubuntu in a Virtual Machine
This guide will help you install Ubuntu in a Virtual Machine. It is written under the assumption you are using Windows. The VirtualBox installation for MacOS should be pretty much the same. For Linux distributions, install VirtualBox through your package manager.
We may have some spare USBs with copies of the Ubuntu ISO at the InstallFest. If you are using one of these you do not need to download the ISO, instead copy the ISO to your machine from the USB (and don't forget to give the USB back when the copy has finished!).
You will need:
- The Ubuntu ISO
- If you are borrowing a USB stick from us then copy the ISO to somewhere sensible on your device
- Then you can eject the USB and let someone else use it while you set up the VM with your copy
This guide assumes you have VirtualBox installed. If you don't, it means you skipped the Virtual Machine Pre-install post! Head back there and follow those steps.
Installing Ubuntu - Unattended Installation RECOMMENDED
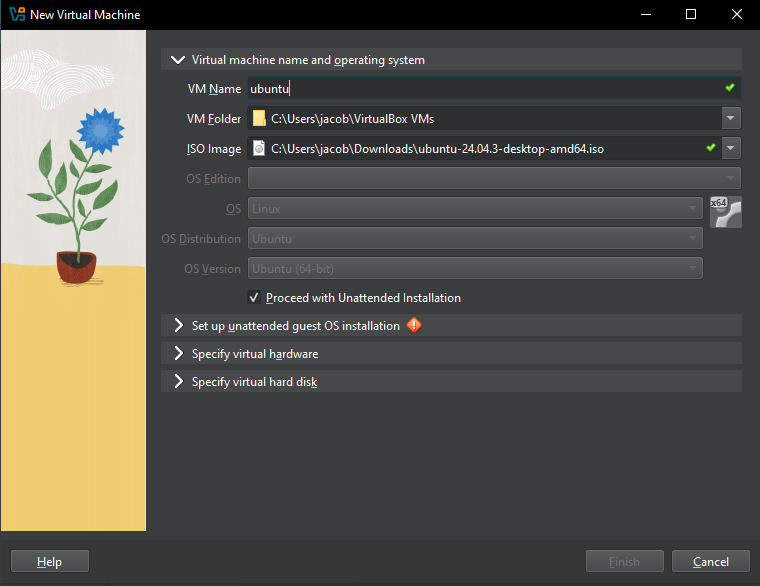
In VirtualBox, go to Machine -> New (or just press CTRL+N). Input the name
you want for your VM (good practice is to include what OS it is), select your local copy of the ISO, and tick "Proceed with Unattended Installation". This will let virtualbox automatically set up your VM without you needing to step through the installer.
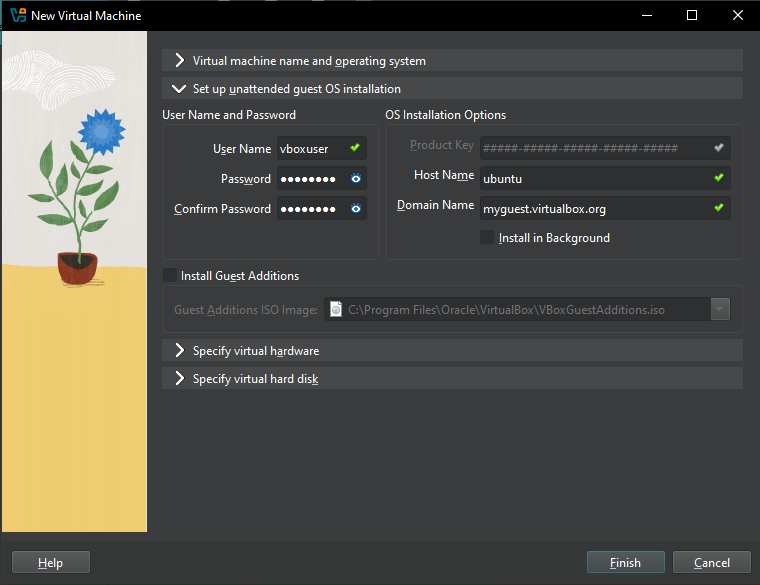
Next pick your username, password and hostname for the user account that will be set up. You can also choose to automatically install Guest Additions (for bi-directional clipboard and shared folders), but we recommend leaving this unticked for now and manually installing them after setup, as it can cause errors that prevent the installation from completing.
Next, you'll be asked to select the memory size. This depends on what specs your machine has. Ubuntu recommends a minimum of 4 GB RAM (4096 MB). You can allocate it more, but don't worry too much, these settings can be modified later too!
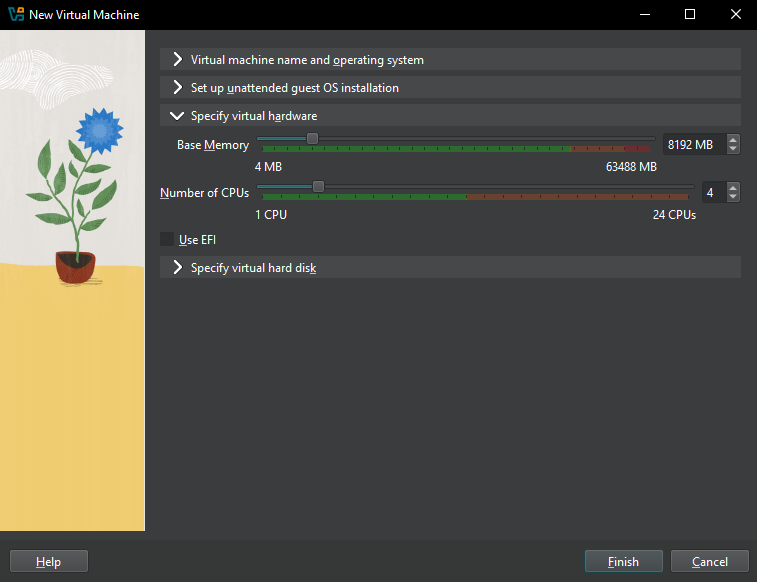
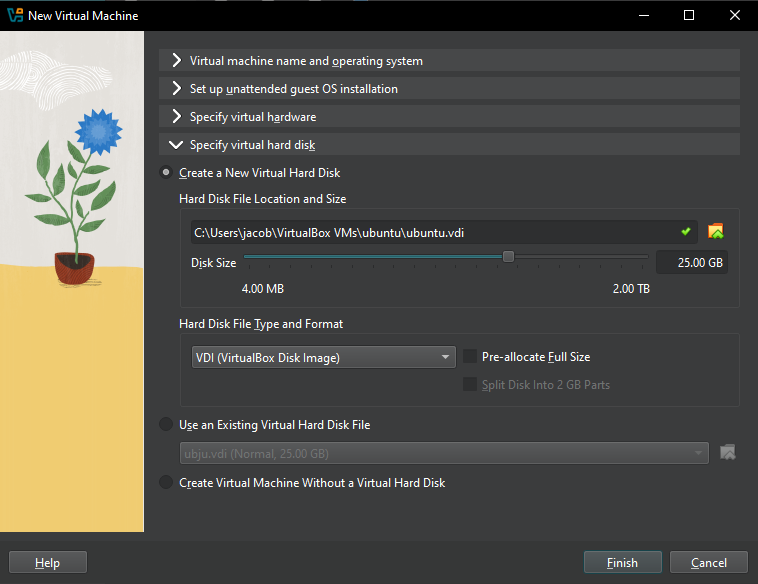
We are then going to create a virtual hard disk now (default option), and the Hard disk file type should be VDI (VirtualBox Disk Image). Choose to have the disk dynamically allocated. Next, choose the size of the hard disk. Ubuntu recommends at least 25GB.
Now you can sit back and relax while your VM is automatically installed and set up. Once it has finished installing, remove the ISO from the VM optical drive if it has not been done automatically. Then you can go here to install guest additions.
Installing Ubuntu - Manual
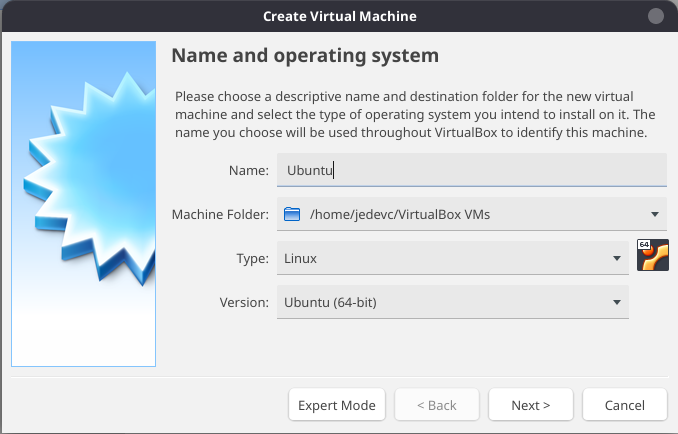
In VirtualBox, go to Machine -> New (or just press CTRL+N). Input the name
you want for your VM (good practice is to include what OS it is), select the
type as Linux and the version as Ubuntu (64-bit).
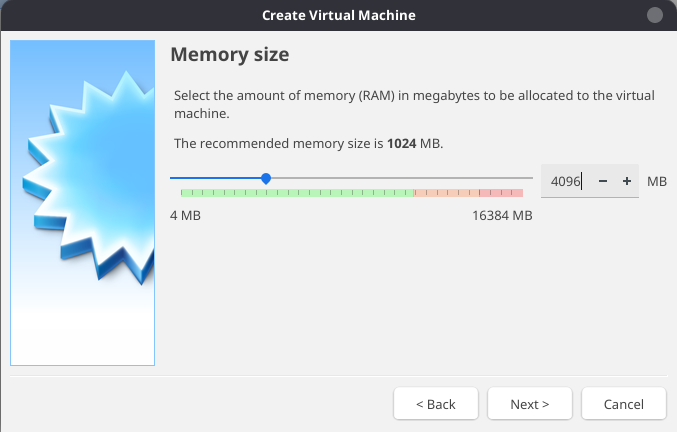
Next, you'll be asked to select the memory size. This depends on what specs your machine has. Ubuntu recommends a minimum of 4 GB RAM (4096 MB). You can allocate it more, but don't worry too much, these settings can be modified later too!
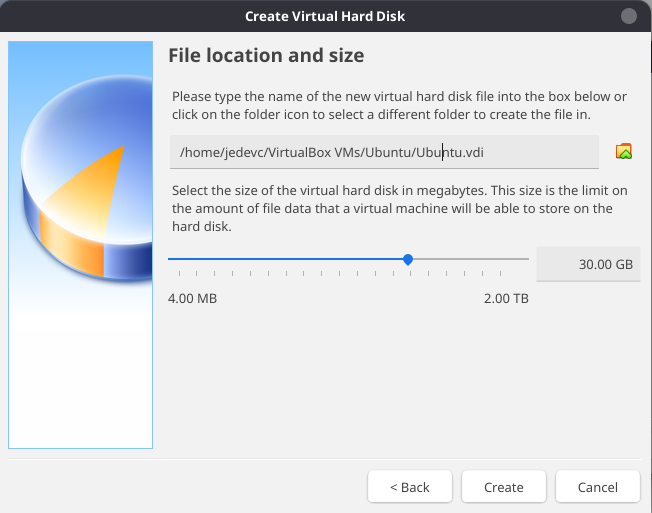
We are then going to create a virtual hard disk now (default option), and the Hard disk file type should be VDI (VirtualBox Disk Image). Choose to have the disk dynamically allocated. Next, choose the size of the hard disk. Ubuntu recommends at least 25GB.
Done! You should now see your new VM in the list:
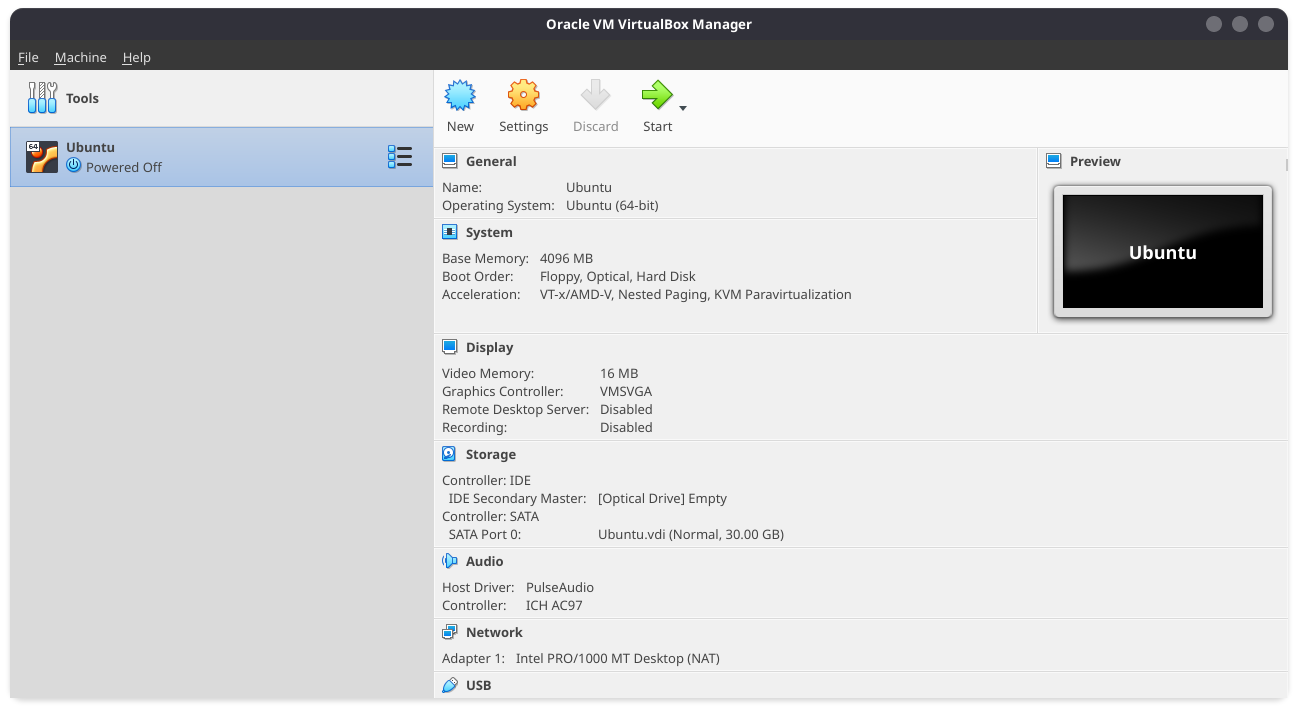
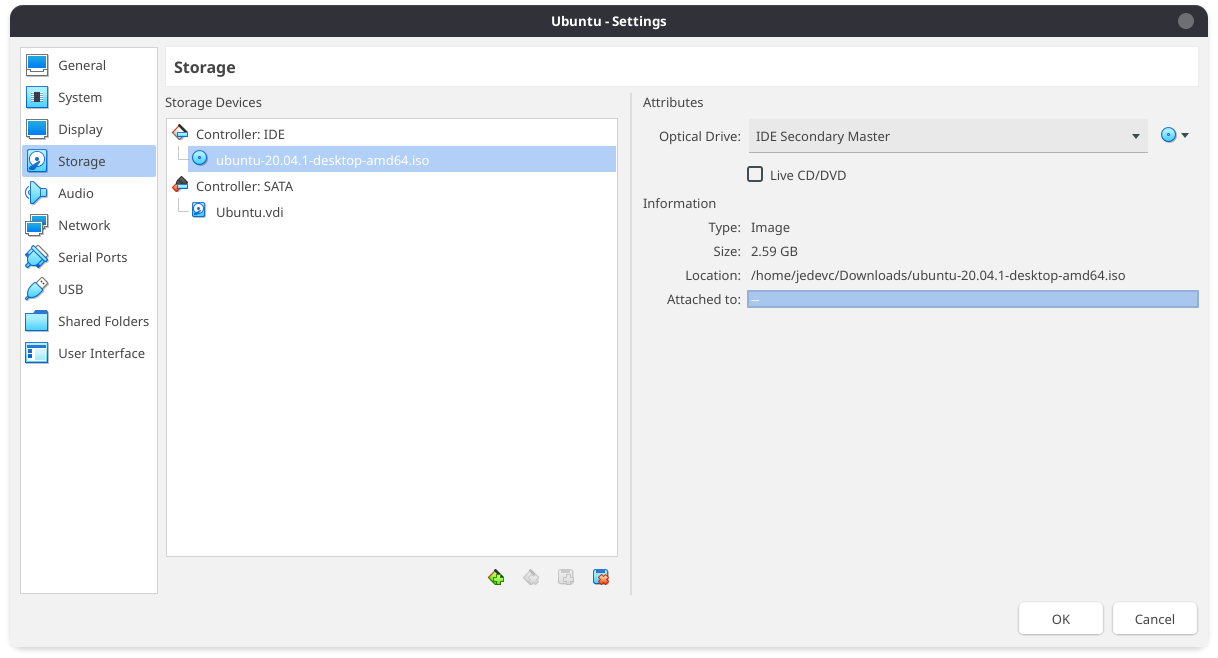
Selecting the new VM (called Ubuntu in this example), click Settings (or
press CTRL+S) and go to the Storage option. Under Controller: IDE, click
the Empty disk. Click the blue disk next to the Optical Drive dropdown, and
select Choose a disk file. Navigate to where you saved the Ubuntu ISO and
open it.
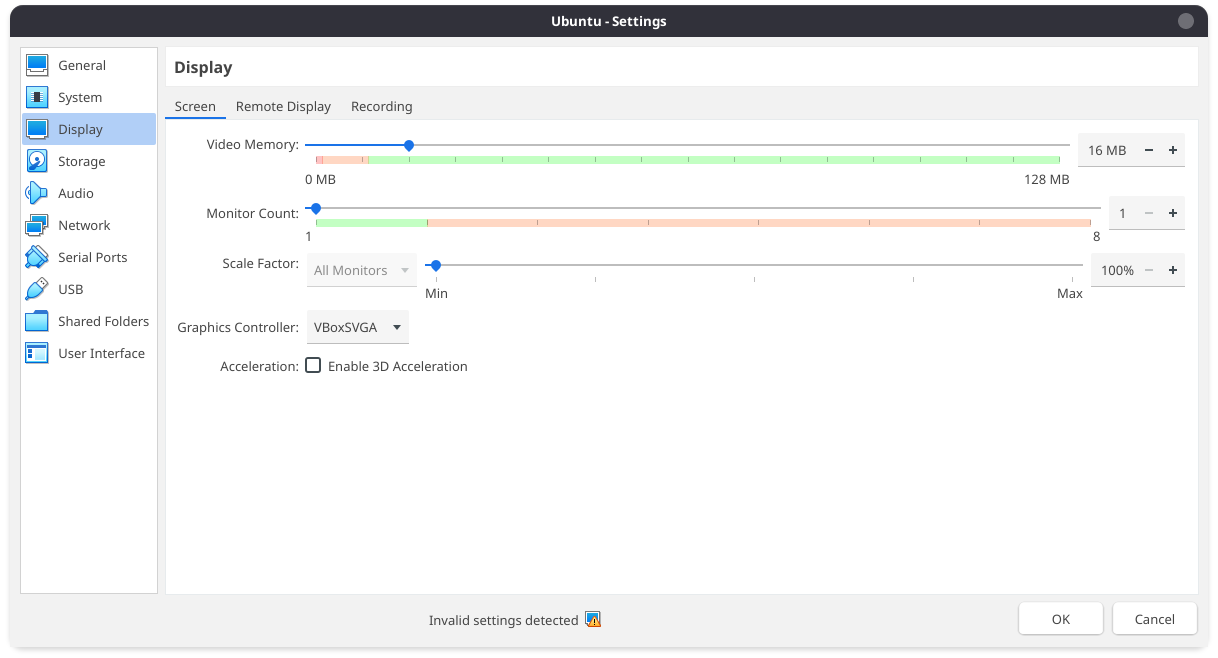
To simulate having a graphics card, VirtualBox allows you to set the amount of Video RAM given to the VM. It defaults to really low, so if you're going to use the GUI of the VM a lot it's recommended to boost it to max so the VM is nice and smooth. To do this go into the machine settings, select the display tab and drag the slider all the way to the right.
Back to the list of VMs, select the Ubuntu VM and press Start. Your VM should start. You may be asked to confirm the startup disk, select the Ubuntu ISO and press Start.
Note: If your VM gets stuck in a boot loop and the error message is related
to VMSVGA, you need to change the graphics controller. In Settings, go to the
Display option and change the graphics controller to be VBoxSVGA.
Back to the VM booting -- the Ubuntu installer should greet you:
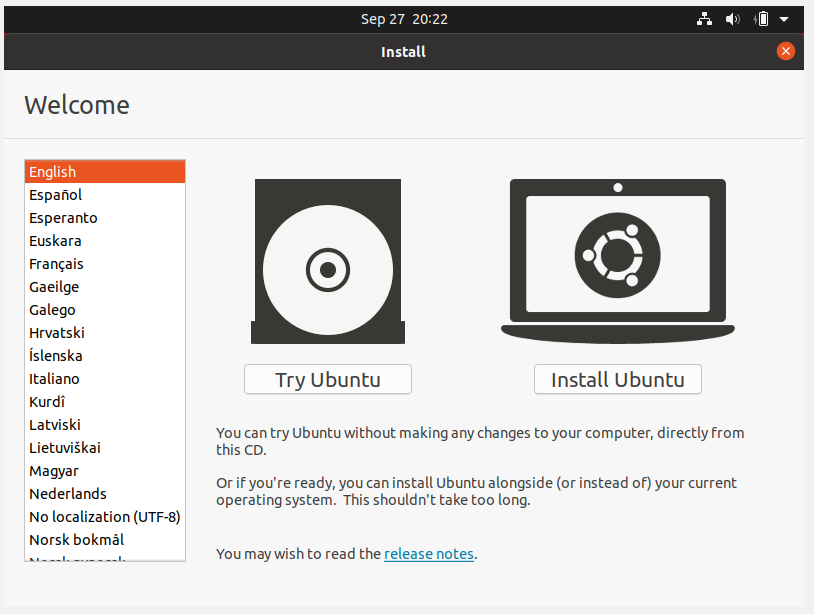
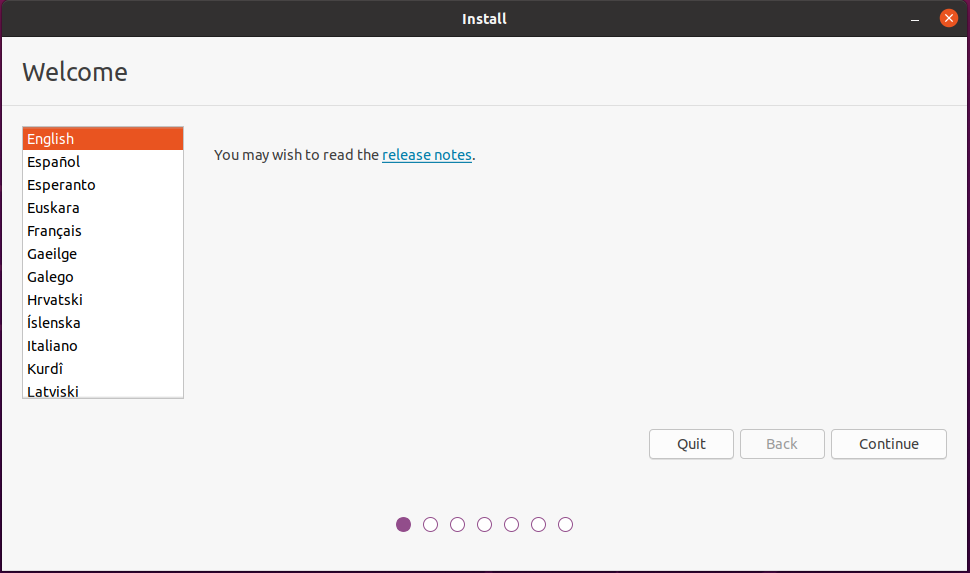
Click "Install Ubuntu" and follow the steps through.
Select your language
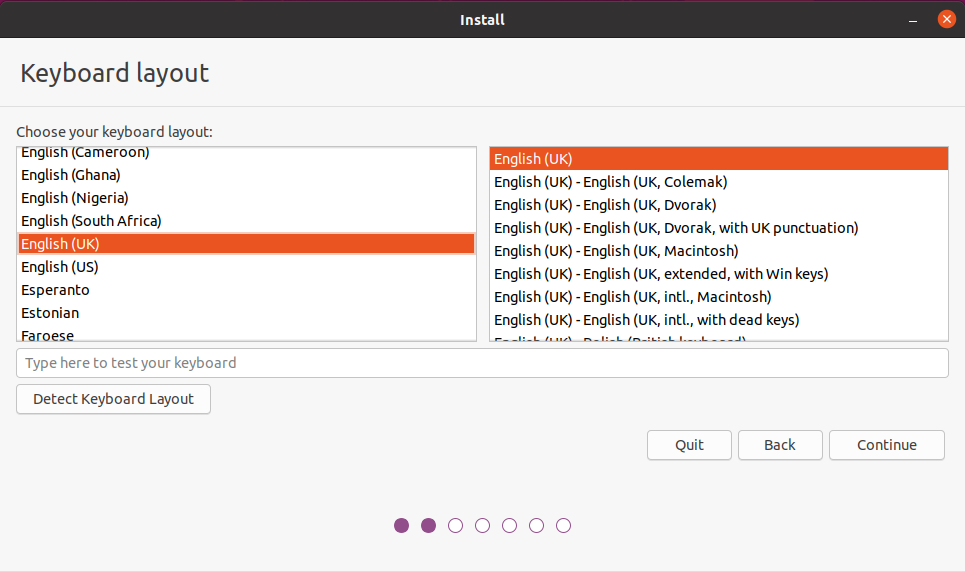
Select your keyboard layout
The auto-detect keyboard should walk you through finding out exactly what layout you have if you're not sure.
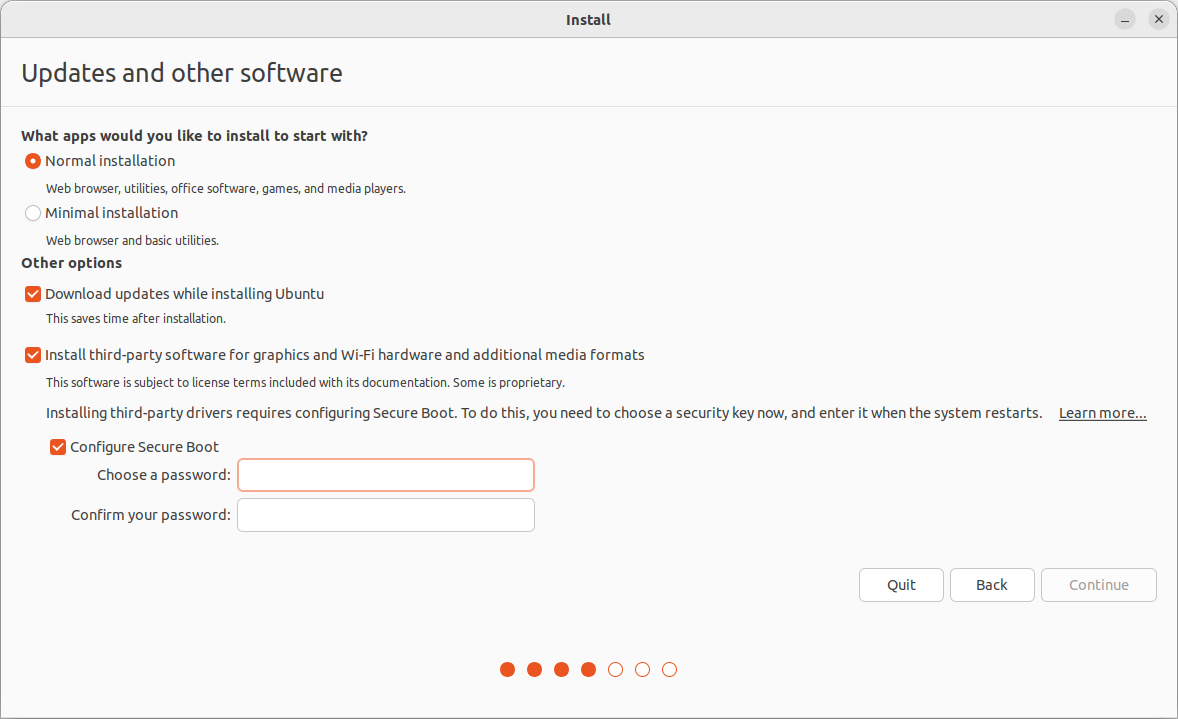
Select software
In most cases you want a "Normal installation" with all the utilities - however, if you're working with less disk space, or want to manually install only the tools you want later, then go with a "Minimal installation".
If you have an internet connection, then select "Download updates" - it makes the install process a little longer, but ensures that everything will be properly up to date.
The "Install third-party software" is slightly more complex. In most cases, you should tick it, and attempt an install - if something breaks and doesn't work, for issues related to drivers, then you can try again, disabling this step, and instead trying to install the drivers and codecs after the install is fully complete.
Choose installation type
Be careful at this step! After you click "Install Now" the install process will begin!
For a pure install, click "Erase disk and install Ubuntu".
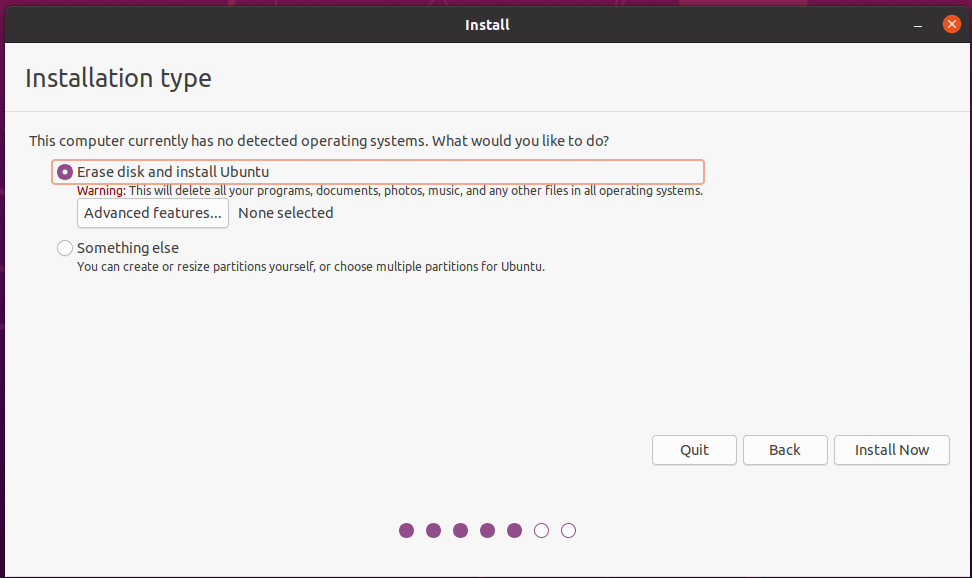
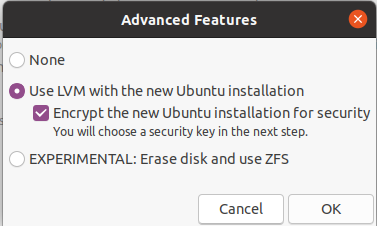
At this step, you can also choose to encrypt your disk, by selecting "Advanced features" and selecting both "Use LVM" and "Encrypt the new Ubuntu installation". However, this is optional, and requires you to input your password at each boot.
After you click "Install Now", you'll be asked if you want to proceed with the partitioning layout you've selected:
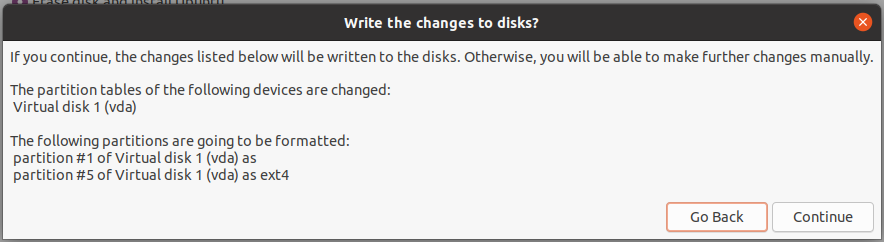
Verify the changes, and then click "Continue". Note that your partitions will look different depending on your setup.
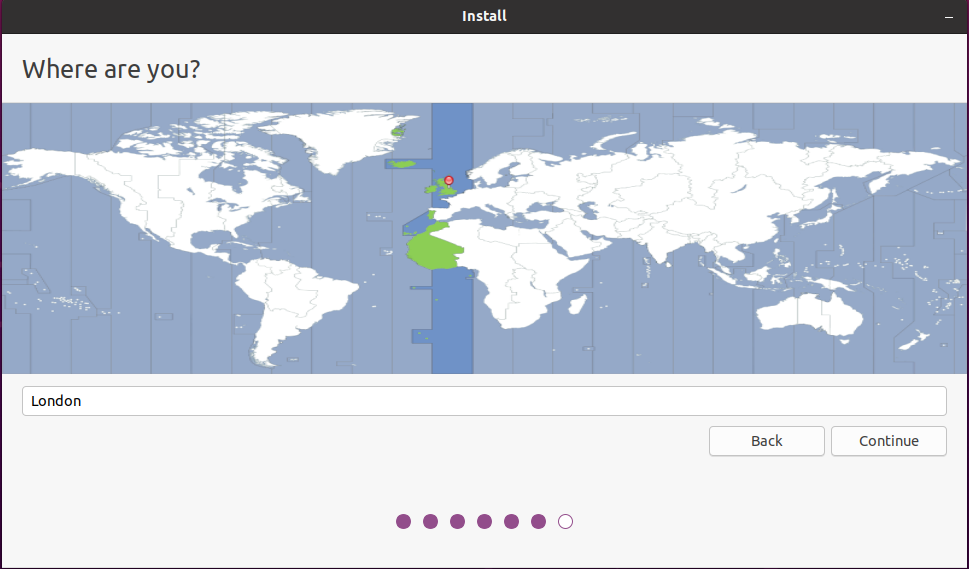
Select your timezone
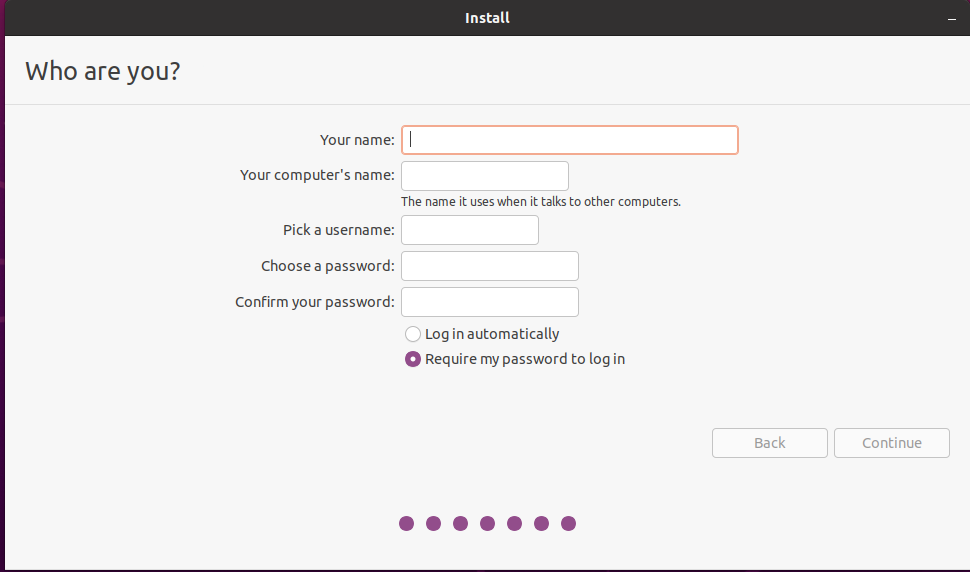
Setup your account
You need to pick:
- Your name (used in the display manager to greet you, etc)
- Your computer's name (the hostname used on networks, pick something unique and recognizable)
- Your username (used to login, appears in shell prompts, etc)
- Your password (standard password guidelines apply, if you want something easy to remember and secure, try diceware)
Wait!
Now just wait for the installer to complete!

Installing Guest Additions
Guest Additions from VirtualBox will allow you to enable some very useful features, such as bi-directional shared clipboard (i.e. you'll be able to copy-paste between you host and the VM) and shared folders. Let's get started!
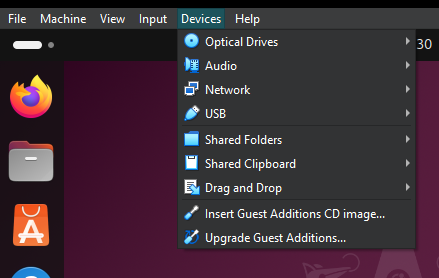
With the VM open, go to Devices->Insert Guest Additions CD image....
This will mount the guest additions CD into the VM's optical drive.
Note: if you still see the Linux ISO in the optical drive dropdown, remove it! If you fail to remove the ISO, the VM will boot from the Live CD, not from the VM disk!
Open up a terminal and install gcc, make, perl and bzip2:
sudo apt install gcc make perl bzip2
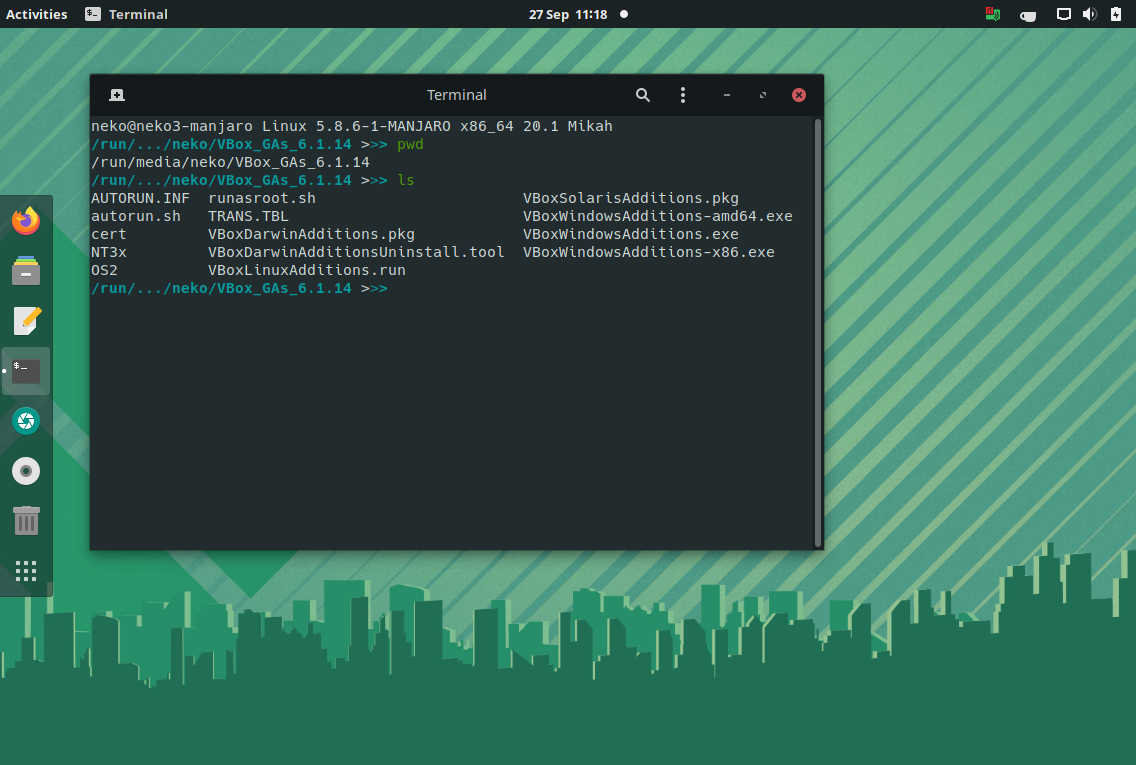
Go to the Guest Additions folder. Replace [user] with your own as needed. (Note that the GA version might have changed meanwhile)
cd /media/[user]/VBox_GAs_7.2.2
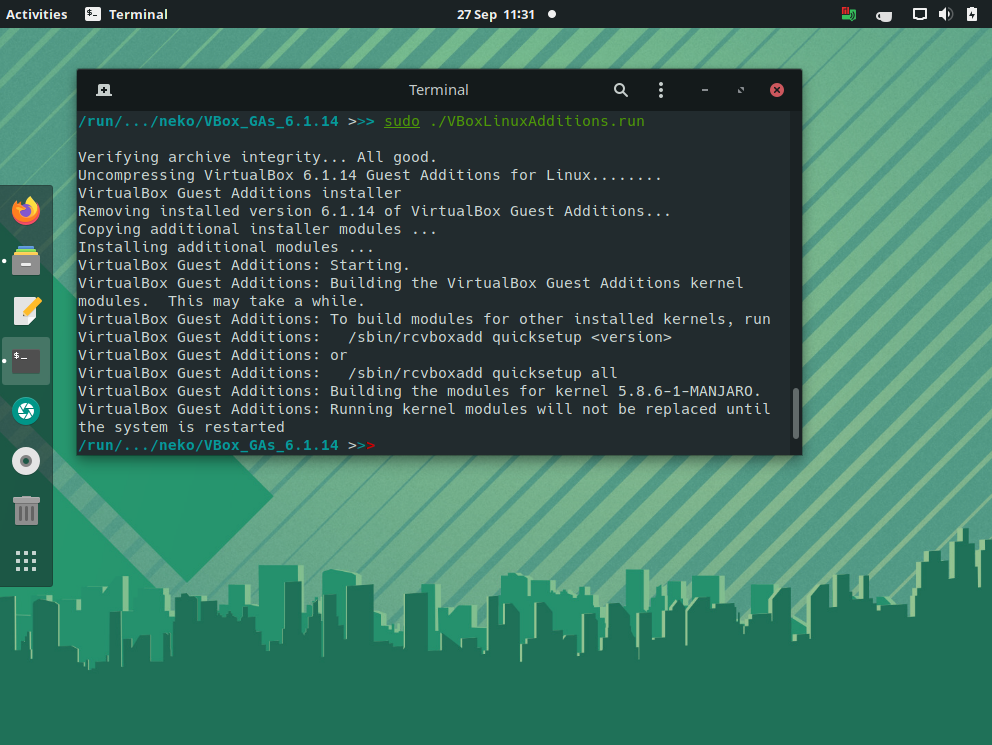
Run the Linux GA:
sudo ./VBoxLinuxAdditions.run
Provide your user password and confirm you want to install by typing yes. It will then finish.
Next, let's make sure to add our used to the vboxsf group, such that we can do shared folders (replace neko with your own username).
sudo usermod -a -G vboxsf neko
Reboot! (You can optionally now remove the Guest Additions ISO from Settings -> Storage)
Bi-directional clipboard
It's very useful to be able to copy between the guest VM and the host. I usually use the browser on my host machine, and often times I find myself copying stuff from the host to the VM. In order to enable the clipboard, just do to Devices -> Shared Clipboard and choose which one suits you best. I always go for Bidirectional :-) All done, it should just work now!
Shared folders
It's also super useful to have a shared folder between your VM and host. This means you don't have to copy across text or files, they can be seen by both the VM and the host!
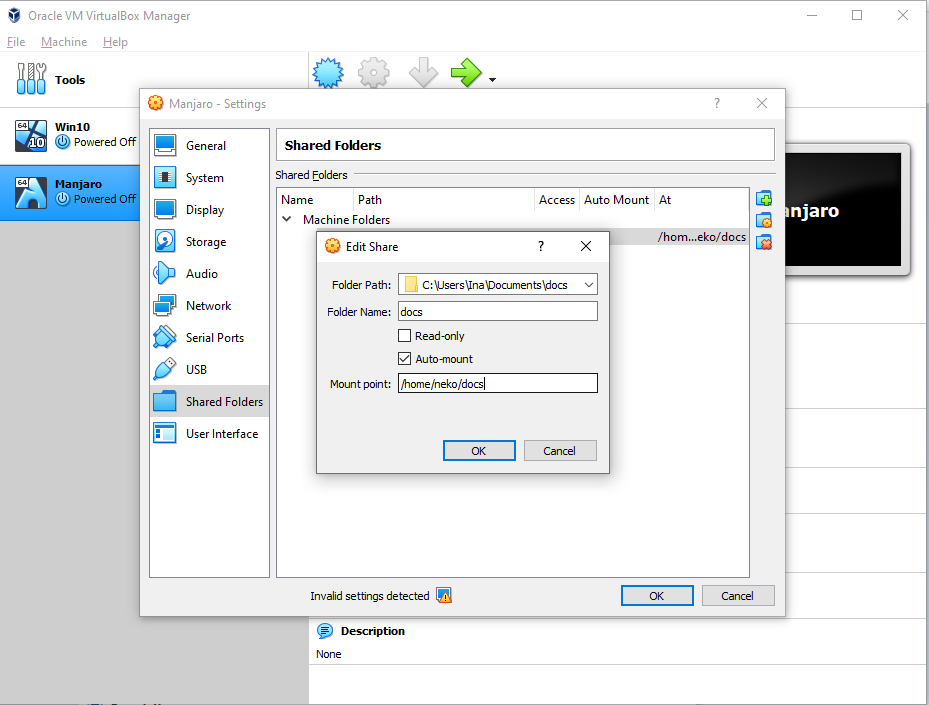
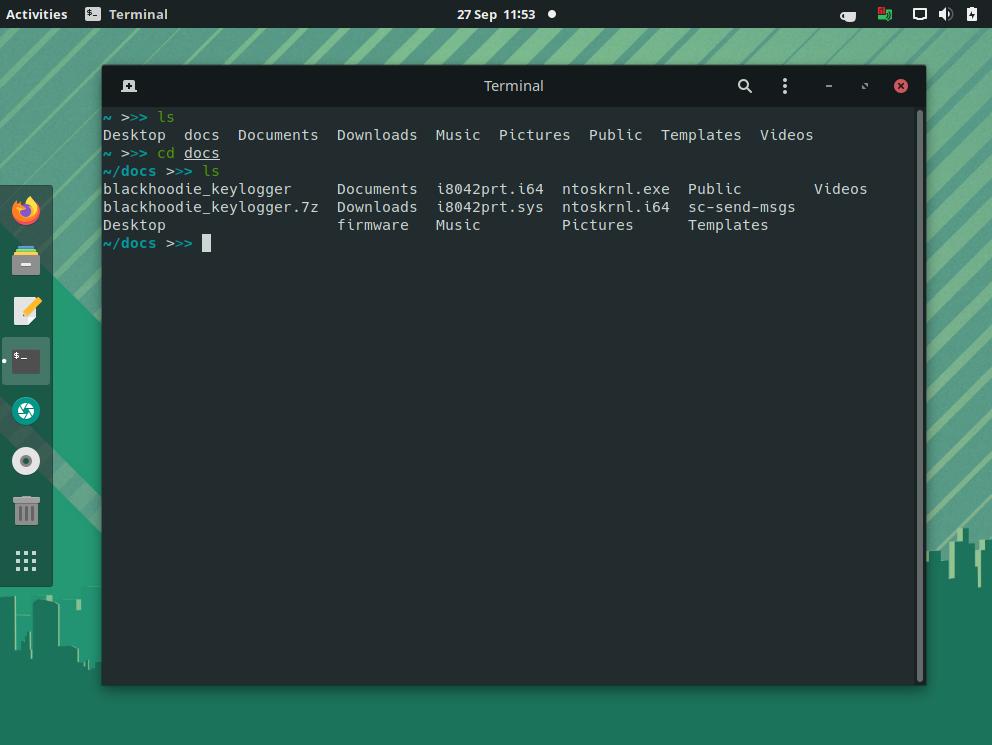
In order to setup a shared folder, we'll start with the VM powered off. Now
go to Settings -> Shared Folders. Click the folder with plus icon on the
right hand side. For the Folder Path box, click the dropdown button ->
Other... and navigate to the folder you want to share! In my case, I'll share
a folder called docs in my Documents. You can leave the Folder Name as it
defaults to, or you can give it a different name. This is how the folder
will be named in the VM! You can also make it auto-mount, and give it the
path in the VM it will appear under. Remember, in Linux, your home
directory is always /home/[your username]. In my case, I chose to mount
under the docs directory my home directory. Click Ok until you exit
Settings. Now start your VM!
Now you should see your shared folder in your home directory! Congrats!
Enjoy your new Ubuntu VM!
Now head over to the Post Installation guide to update your system and install some useful software!